Summer is slowly drawing to a close here in Indiana. Last year was definitely a unique school year - our towns used a hybrid approach to keep schools open and the students attended every other day due to COVID. I had the opportunity to substitute teach locally when COVID was in full swing and our communities were trying hard to keep schools open. It was a fun (and hard) experience! I decided to make a school year easel calendar and sticky note holder for one of my favorite middle school teachers!
Blog Supplies:
- Cardstock Warehouse Cardstock Papers in:
- Colorplan Tabriz Blue, Racing Green, Real Grey, Smoke
- Pop-Tone Lemon Drop, Sour Apple, Wild Cherry
- Sirio Nude and Ultra Black
- Speckletone Kraft
- Cherry Wood Veneer
- Green polka dot cardstock (or any patterned or printed pattern cardstock)
- Printer paper (to print calendar)
- Lightweight Chipboard
- Binder Clips
- 2 Way Zig Pen
- Scor-Tape
- Paper Trimmer
- Score Board
- Sticky Notes (3x3 pad or larger - smaller than 5x5)
- Electronic Die Cut Machine (optional, for back to school die cuts)
Assembling the Calendar:
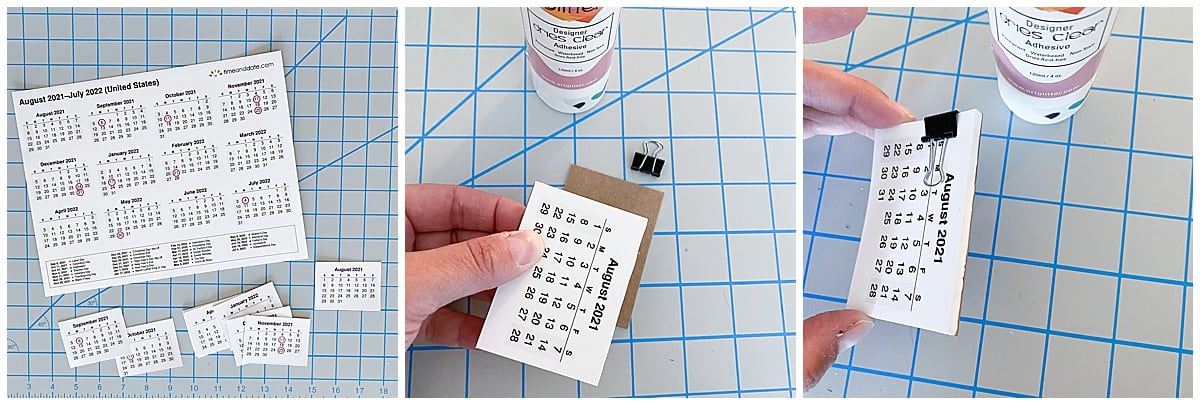
I started by assembling a tear-off school year calendar using timeanddate.com. I printed the yearly calendar, landscape orientation, onto regular printer paper, and used my paper trimmer to cut each month into 2.75” x 2” rectangles. I assembled the months in order starting with August. I cut a small piece of chipboard down to 2.75” x 2” and I attached the calendar pages to the chipboard with a binder clip. To create a tear away binding, I applied liquid adhesive along the top edge and allowed the calendar to dry. I repeated the glue application twice and allowed it to dry overnight before removing the binder clip.

Building the Easel Card:
To create the easel card, I cut Colorplan Tabriz Blue into (1) 5.5” x 5.5” and (1) 5.5” x 11” panel. I recommend using at least 100 lb. cardstock to create the easel card so it can hold the weight of the tear off calendar. I scored the 5.5” x 11” panel, landscape, at 2.75” and 5.5”. I folded in the two score lines, towards the 5.5” square portion of the panel. I adhered the 5.5” x 5.5” panel to the 2.75” portion of the larger panel - applying adhesive only to the 2.75” portion.

When the easel is closed, the two 5.5” portions should fully align. I cut and adhered (2) 5” x 5” panels of green polka dot cardstock to the outside and inside of the easel.

Assembling the School Die Cuts:
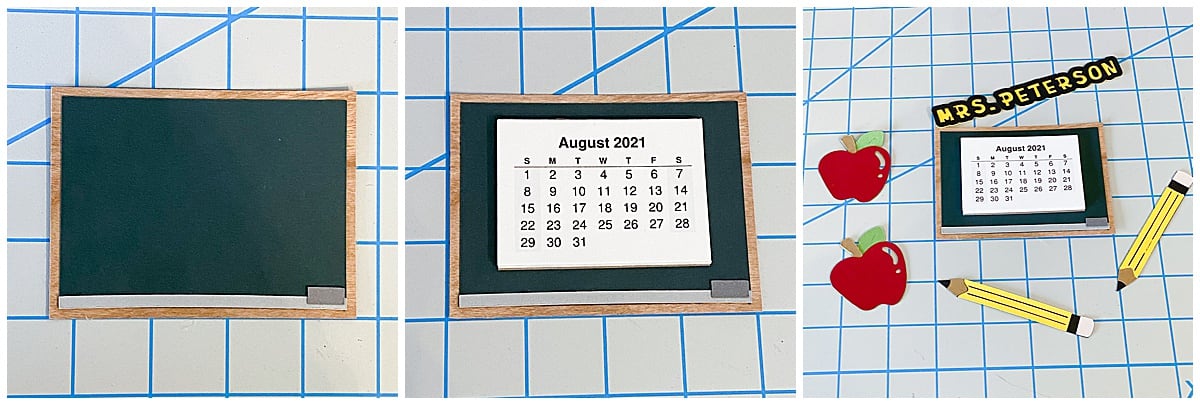
To create a chalkboard, I cut a 4” x 3” rectangle from the wood veneer cardstock. I cut a second rectangle from racing green, measuring 2.75” x 3.75”. I adhered the racing green rectangle centered on top of the wood veneer cardstock with liquid adhesive. I cut a thin strip measuring 3.75” x ⅛” out of real grey cardstock and adhered it to the bottom of the racing green rectangle. I used a scrap of smoke cardstock (measuring ½” x ¼”) and adhered it to the bottom of the chalkboard. Using scor-tape, I glued the calendar to the chalkboard.
I used Cricut Design Space Files to cut the apple and the pencil. I cut and assembled the pencil using Lemon Drop, Nude, Ultra Black and Kraft. The apple was made using Sour Apple, Wild Cherry and Kraft. I picked a font and used the offset feature for the teacher’s name.

Final Assembly:
The sticky note pad was adhered to the bottom of the easel card (see photo). The sticky note pad is what holds the easel open. To finish the easel calendar, I adhered the chalkboard, apple, pencil and teacher’s name.

What are you crafting for your teachers? We'd love to see! Show us your creations on Facebook or Instagram. Use hashtag #cardstockwarehouse for a chance to be featured in our stories!
Happy Crafting!
Traci Selig
IG: @tracicrafty
Blog: www.tracicrafty.com


