I scream, you scream, we all scream for ice cream!! How fun is this little ice cream treat holder? It would make such a cute party favor or small gift. I'd love to show you how to make it, so let's get started!
Supplies:
- Cardstock Warehouse Papers:
- Woodstock 83lb - Verde
- Lessebo 83lb - Bubblegum, Flamingo, White, Vanilla, and Shitake
- Bearly Art® Liquid Glue
- Glue Gun + Hot Glue
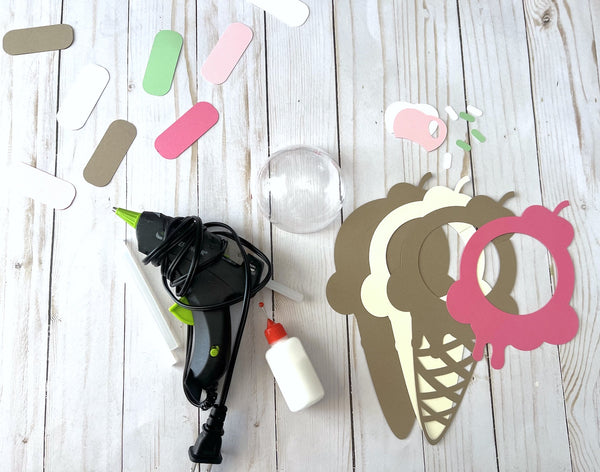
- 3” DIY Clear Fillable Plastic Craft Ball Christmas Ornaments (found these on Amazon)
- Treats to fill your holder
- Creative Fabrica Ice Cream Holder SVG File
Start by downloading the file and uploading it to your cutting machine's software. I am using a Cricut. Change the colors to the colors you will be using, and then cut out all of your pieces. You can see the colors I used listed above.

Now, layer and glue together the pieces of the cone. The cone comes with a base, a middle layer, a top layer, and then the ice cream layer. Once you've assembled those, glue together the two layers of the cute little cherry and add that on top.

Sprinkle time! This is my favorite part! Arrange and glue the sprinkles where you would like them to be on the ice cream. The more the merrier here! Who doesn't love more sprinkles?

Now it's time to fill your treats in the craft ball! I did this by adding a thin line of hot glue around the opening on the ice cream cone and carefully attached the craft ball to it. The back of the treat holder has an opening you can open to get the treats out. It's so fun to watch the kids pop these open!

And now you're done! These are perfect for kids party favors, school parties, birthday gifts, or to brighten someone's day!

I hope I have inspired you to Make Something Beautiful® today! Making any fun paper crafts? Be sure to show us on Facebook and Instagram! You can tag your creations with #cardstockwarehouse to be featured in our stories.
Happy Crafting!
Melissa
Instagram: @sweetbuttercupdesigns & @diy_melissa
Etsy: Sweet Buttercup Designs


