The Stockings Were Hung...
Yes, yes, yes! We have finally arrived at my most favorite time of the year! Fall, then Thanksgiving, and wrapping it up with Christmas! I am so full of joy right now! Getting prepared for the holiday season makes me absolutely happy! Therefore, I am sharing with you one of the things that I love to do to prep for my family's tree ceremony. I am making holiday ornaments. I usually light a candle and put on some quiet Christmas music. Today, I am sharing with you an SVG file that I created so that you can make your very own ornament as well. And to add a special touch, it’s a shaker! Because… Why not? So let’s get started with making these cute little ornaments.
SUPPLIES:
- Cardstock Warehouse Cardstock Papers
- Gold Touch MirriSparkle 104lb
- Silver MirriSparkle 104lb
- Gold Mirror 100lb
- Silver Mirror 100lb
- Chartreuse Colorplan 100lb
- Bright Red Colorplan 100lb
- Bright White Colorplan 100lb
- FREE Shaker Stocking SVG by Tmika
- click the link, then right click the image to save to your computer.
- Bearly Art Glue
- Glue Pen
- Foam Dots
- Hot Glue
- Flower Dies
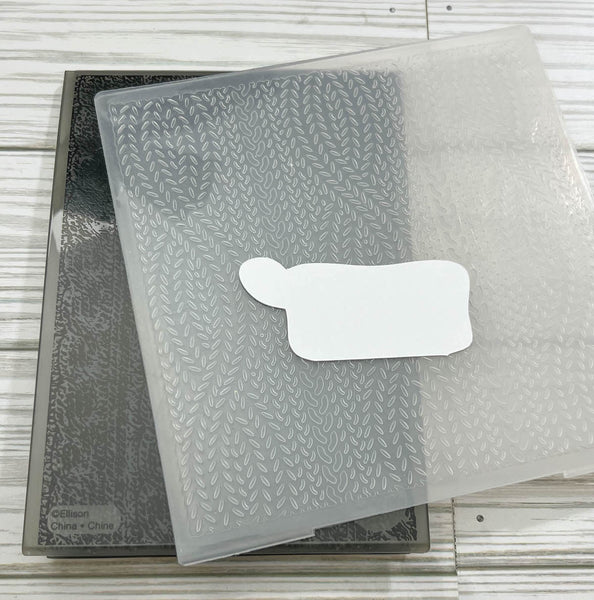
- Embossing Folder
- Flower Center/Foam Glitter Balls
- Shaker Mix
- Eyelets
- Ribbon or Twine
Start out by adding the SVG listed in the supplies above to your machine's software. Delete the labels, create duplicates for your shaker layers, and assign colors to your pieces if your machine requires ir. I usually do 4 to 6 layers for my shaker depending on my shaker mix. Here is my screen when I uploaded, and once I was ready to cut.

Now it's time to cut your base in solid cardstock and acetate. I used Chartreuse and Bright Red for my bases. Next, cut out your shaker layers. The top layer always is the decorative one, and I cut these out of Gold and Silver Mirror cardstock. Next, cut out your middle insert. This is an offset from your layers. It could be pattern paper or you could use another piece of solid cardstock like I did.

Next, you have your stocking top layer, your stocking base, and your die cut word shadow and layer. I chose to follow along with the theme that I have been doing in my last few posts of using my dies in my stash. I found some really pretty poinsettia flowers and leaves that I die cut out of solid cardstock. (Colors listed in the supplies.) I will be using those to add little accents to my stocking. You should have everything cut out and ready to go. I am doing two stockings for this post, so here is the other stocking color all cut out.

Use a Cropadile or hole punch to punch a hole in all the layers of your stocking pieces. In order to get accurate measurements lay them one on top of each other and follow the previous hole.

Lay down your base piece first, then lay down your middle layers one on top of each other and adhere with wet glue, making sure to match up the edges and the holes. Lay your slightly smaller inner piece down inside the "hole" once you have completed your stack. Now you can add your shaker mix to your stocking. Once you are satisfied with the height and amount, add your clear acetate piece on top and finish up with your decorative layer topper. Your piece should look like this.

This part is optional but I think it helps add to the character of the stocking. I used a sweater embossing folder to emboss the top of my solid stocking piece. If you don’t have a sweater, a snowflake or some type of texture will do.

Lay down your dry embossed solid piece and then your rectangular stacking topper on top of that. Your stockings should look something like this.

Now you can add your words to their shadows. I used a wet glue to adhere my words to the shadow base. I added foam dots to the back of the completed piece to give them a little POP!

I layered my flowers one on top of the other and added little foam balls to the center. I folded up my leaves so they could appear a little more realistic.

I adhered them to the top of my stocking with hot glue. Also, I thought I would add a little bit of trim to the edge of my stocking to add to the realism.

I added an eyelet to the hole of my stocking and strung some trim and ribbon through to be able to hang them on the tree. That completes my stocking ornament!! They turned out so cute! Have fun and until next time...

Please be sure to leave a comment to let us know what you think. If you are super fancy - tag us in your creations on Facebook or Instagram. You can use the hashtag #cardstockwarehouse to be featured on our page!
Tootles!
Tmika
YouTube
Instagram
Pinterest
Facebook


1 comment
What a fun and festive idea! Thanks for the free svg file!